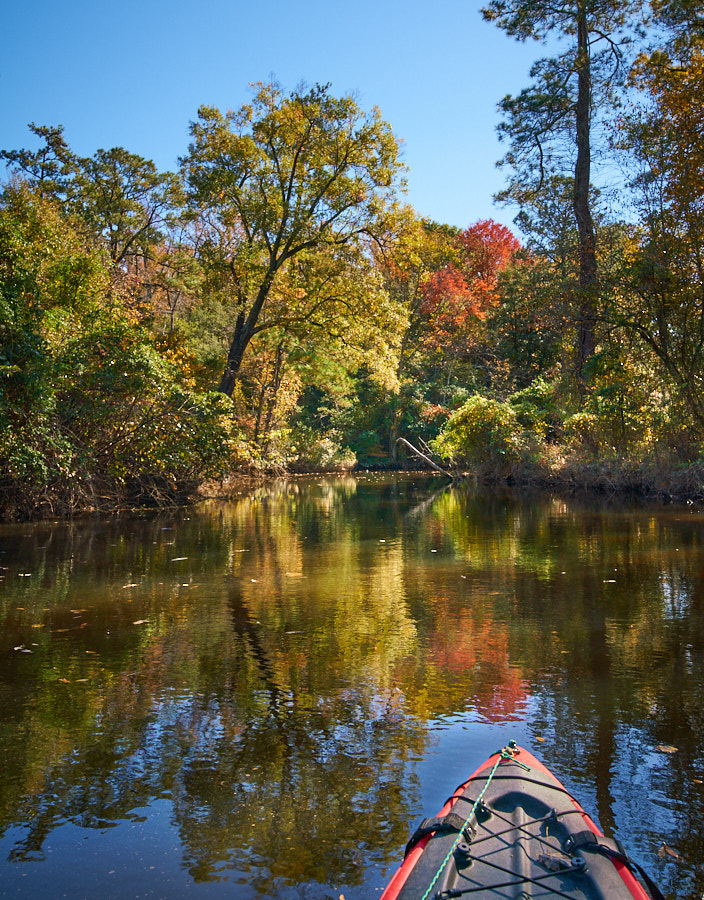
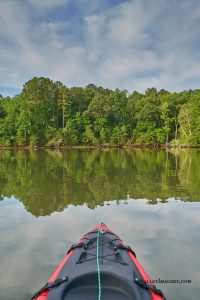
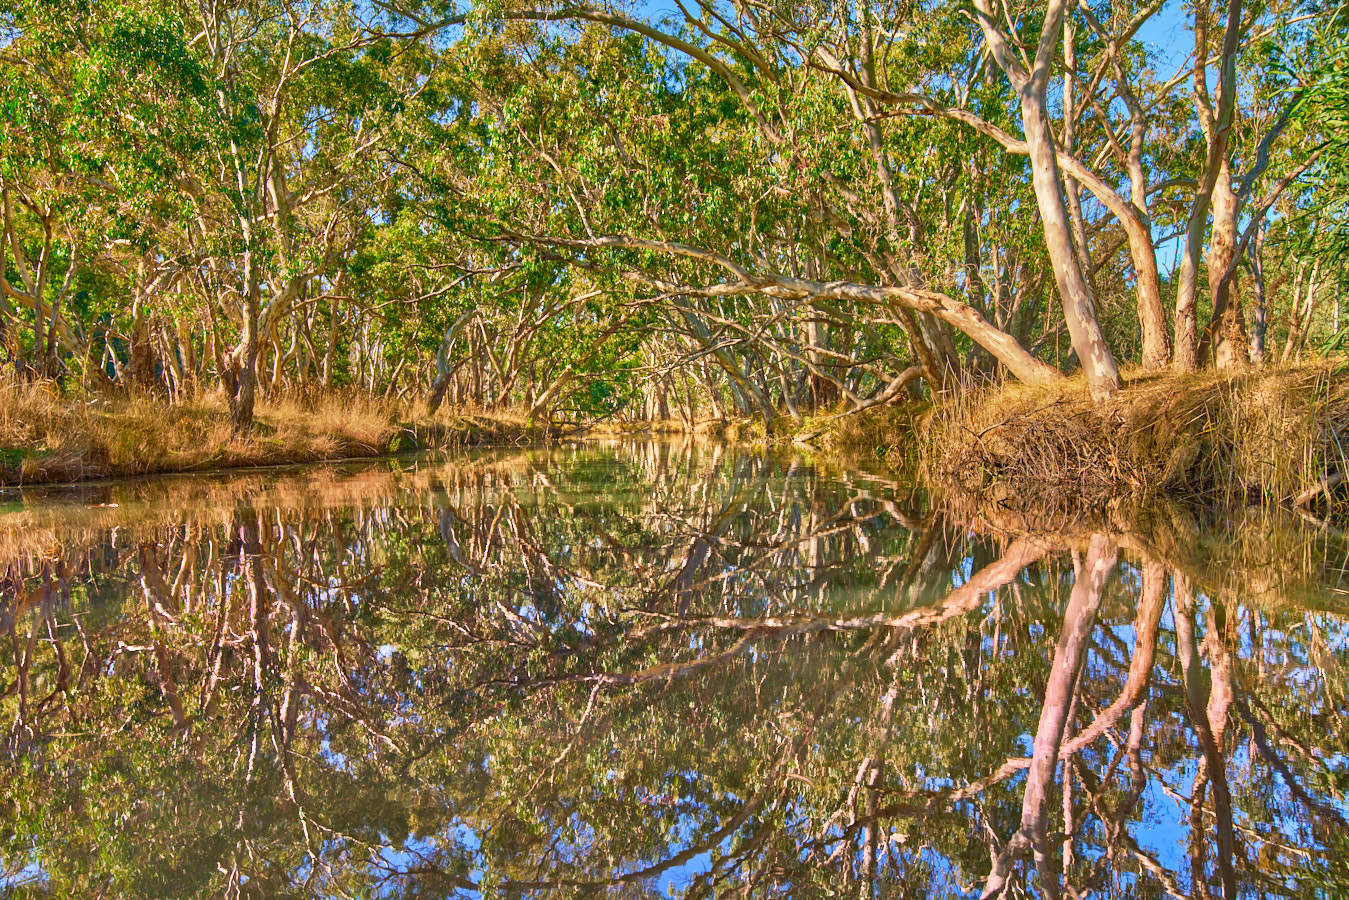
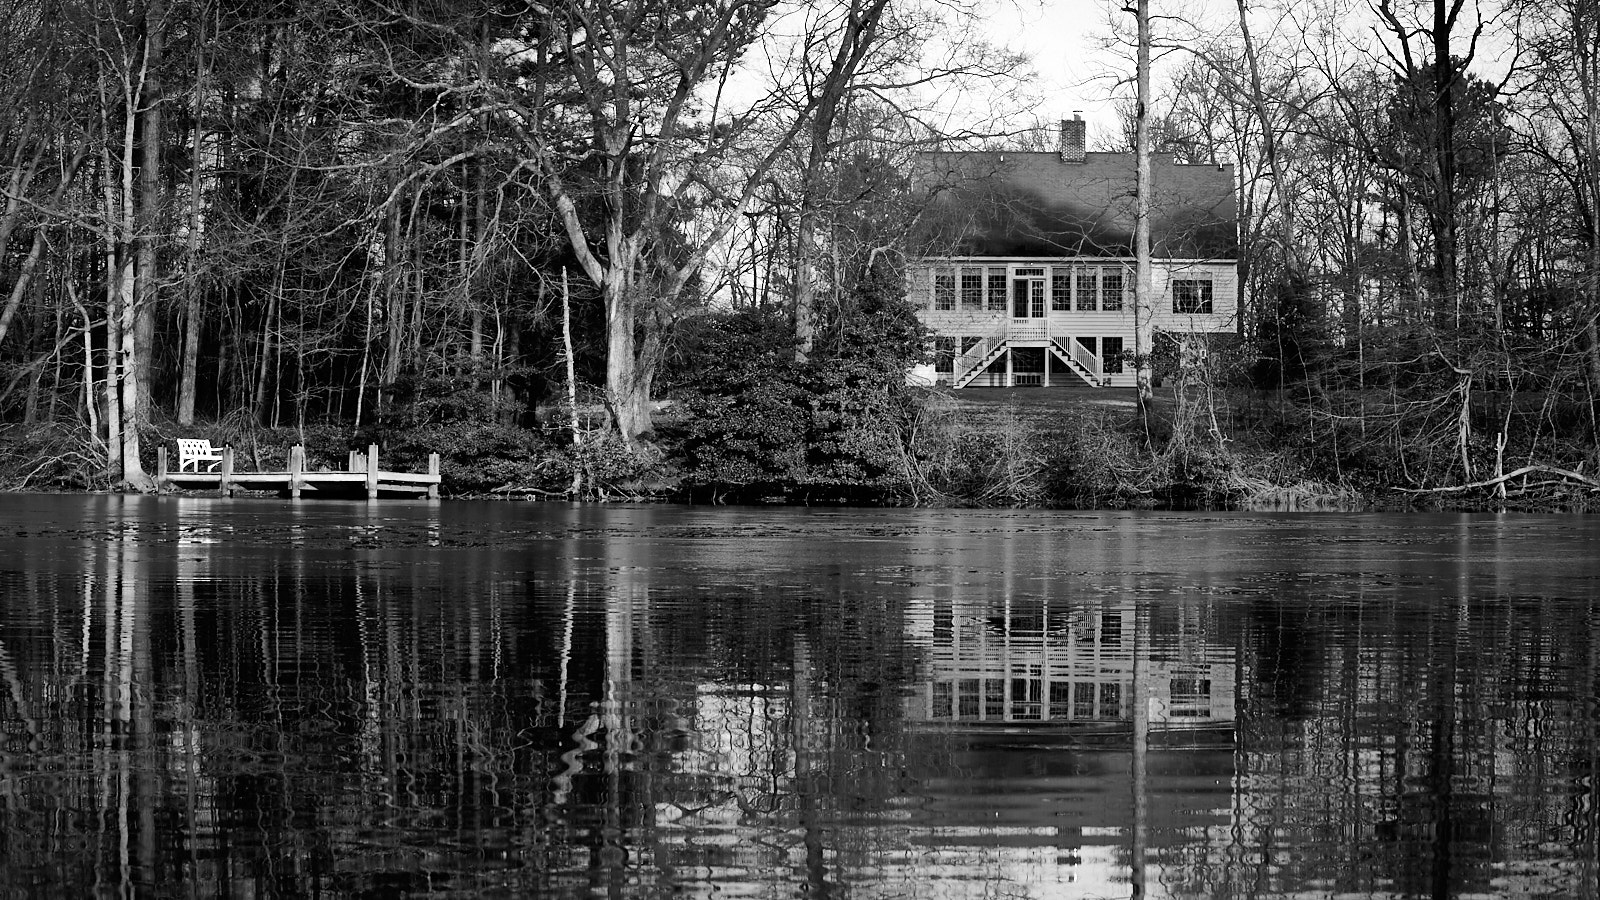
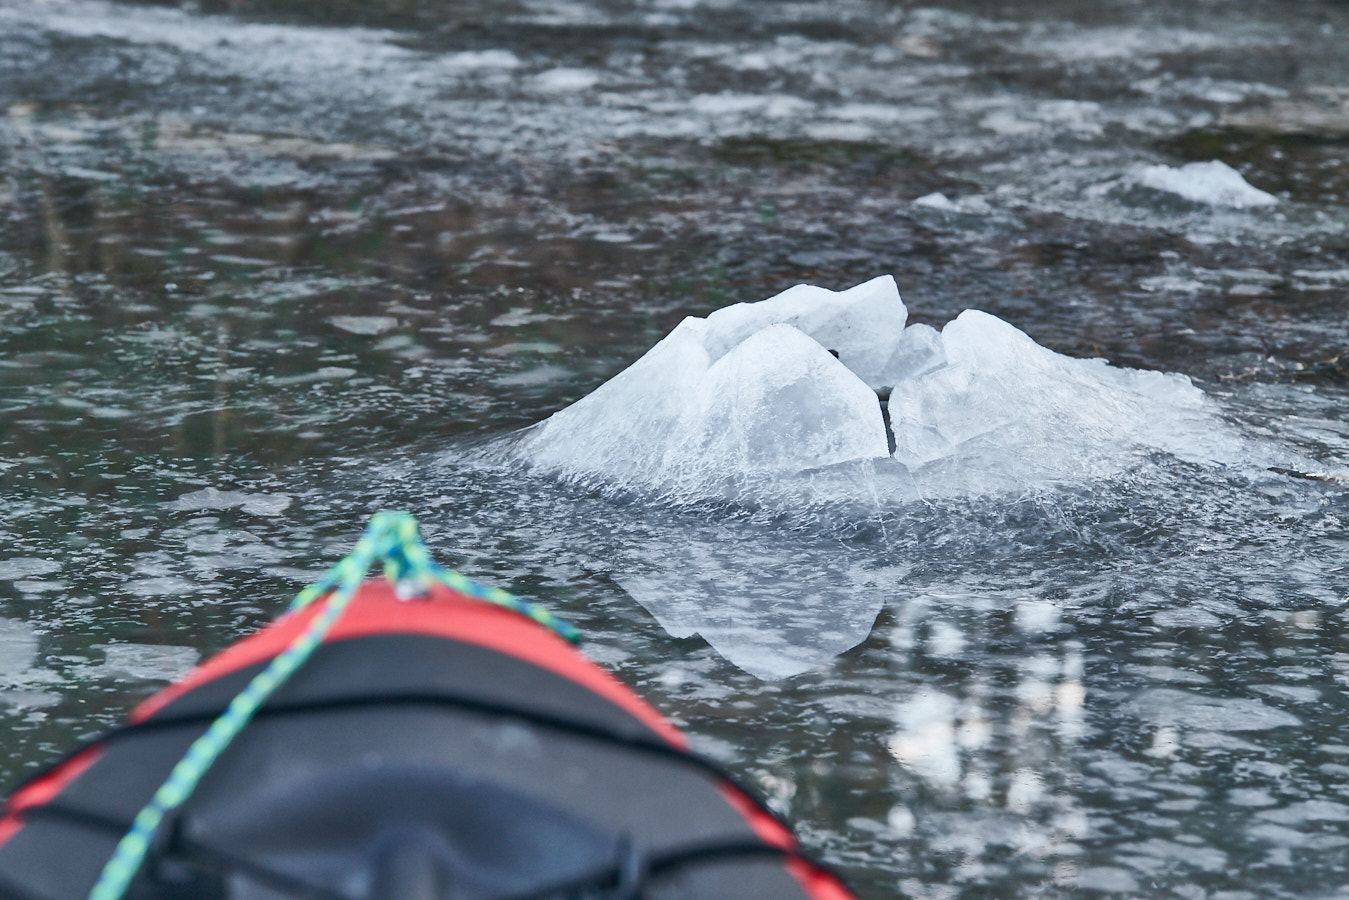
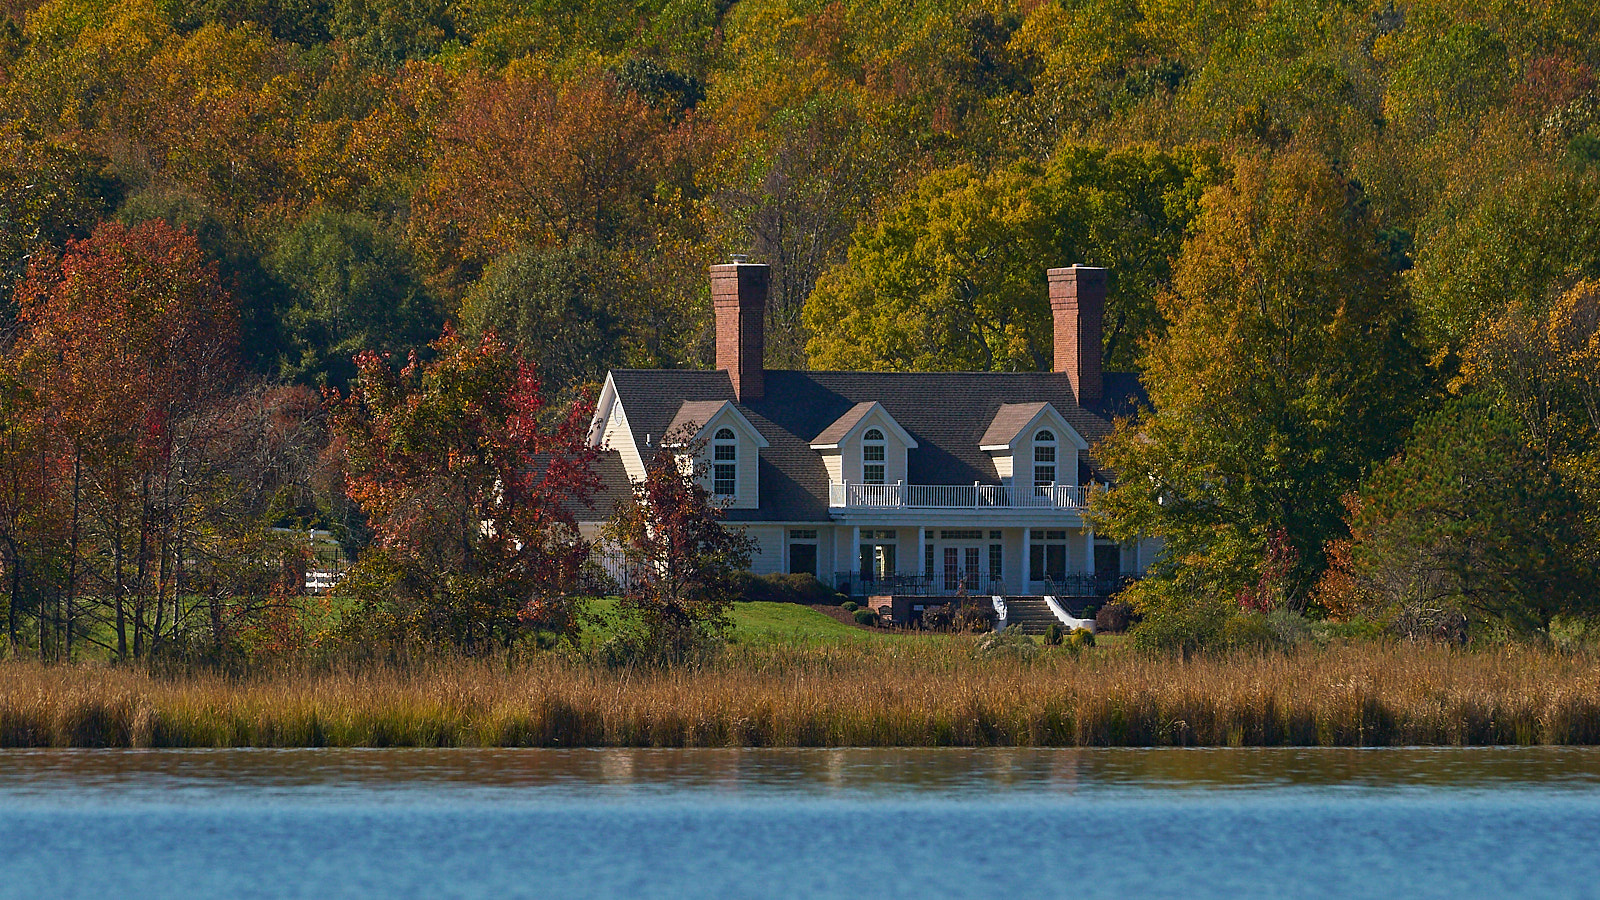
I have been using my kayak to access and photograph places normally inaccessible for a number of years (All the images on this page are taken whilst using the kayak). The Kayak is a great means of getting unique Wildlife and Landscape images, but obviously expensive electronics and water don't mix.
In simple terms, kayak's are just not made to carry lenses, filters and the other important gear us photographers take with us.
The obvious thing is to go buy a simple kayak and then just take the camera along, sounds easy and for many this is the way things turn out. For the serious photographer though, this is a high risk tactic. Having to protect valuable equipment when paddling and continually entering and exiting the water put the camera equipment at significant risk. Many kayaks simply don't have anywhere safe to put our gear.
My suggestion is to first decide the type of photography you want to pursue, then the kind of water you might have to go in to get these shots.
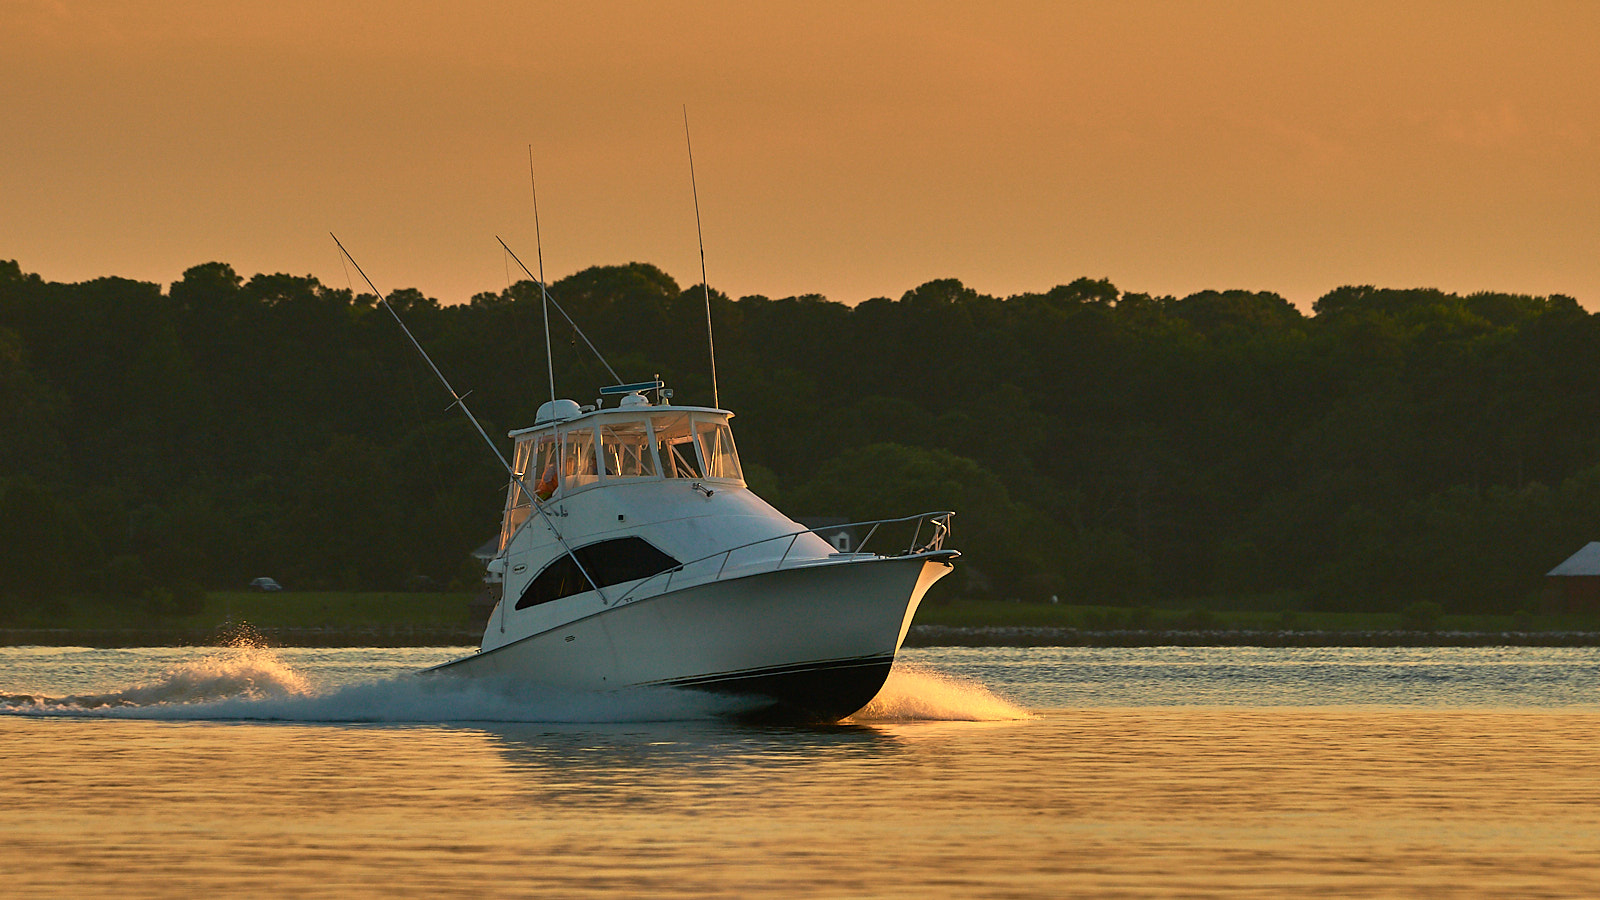
For wildlife and shooting with a long lens, there are some challenges, unfortunately the ocean is rarely a great place to catch water stable enough to grab great shots. Even the smallest waves will mean shooting above 200mm is very difficult (lets leave the 500mm at home this time).
Even simple landscape images with rolling waves can be difficult, the added instability created when concentrating on the viewfinder can make it quite precarious to be in a kayak drifting with the wind and currents. One wrong wave and it will be an expensive lesson. Boats of any size can create decent waves that will rock even the most stable kayak and jet ski's are hard to predict.
Additionally once you put the paddle away to concentrate on the camera an uncontrolled kayak will soon turn with the wind and waves. Even a small wave can breech the side of a kayak bringing water onboard and putting you and the equipment at risk. Any conditions with waves above 6 inches will make photography very difficult.
For these reasons I find the inland lakes and rivers are the best place to take the camera on board. The relative calm, peaceful environment and quietness of a kayak make a great combination. There are still risks however and reasonable waves are possible.
Assuming you already own a camera, choosing a kayak is the biggest decision.
Kayaks are generally classified into two types,
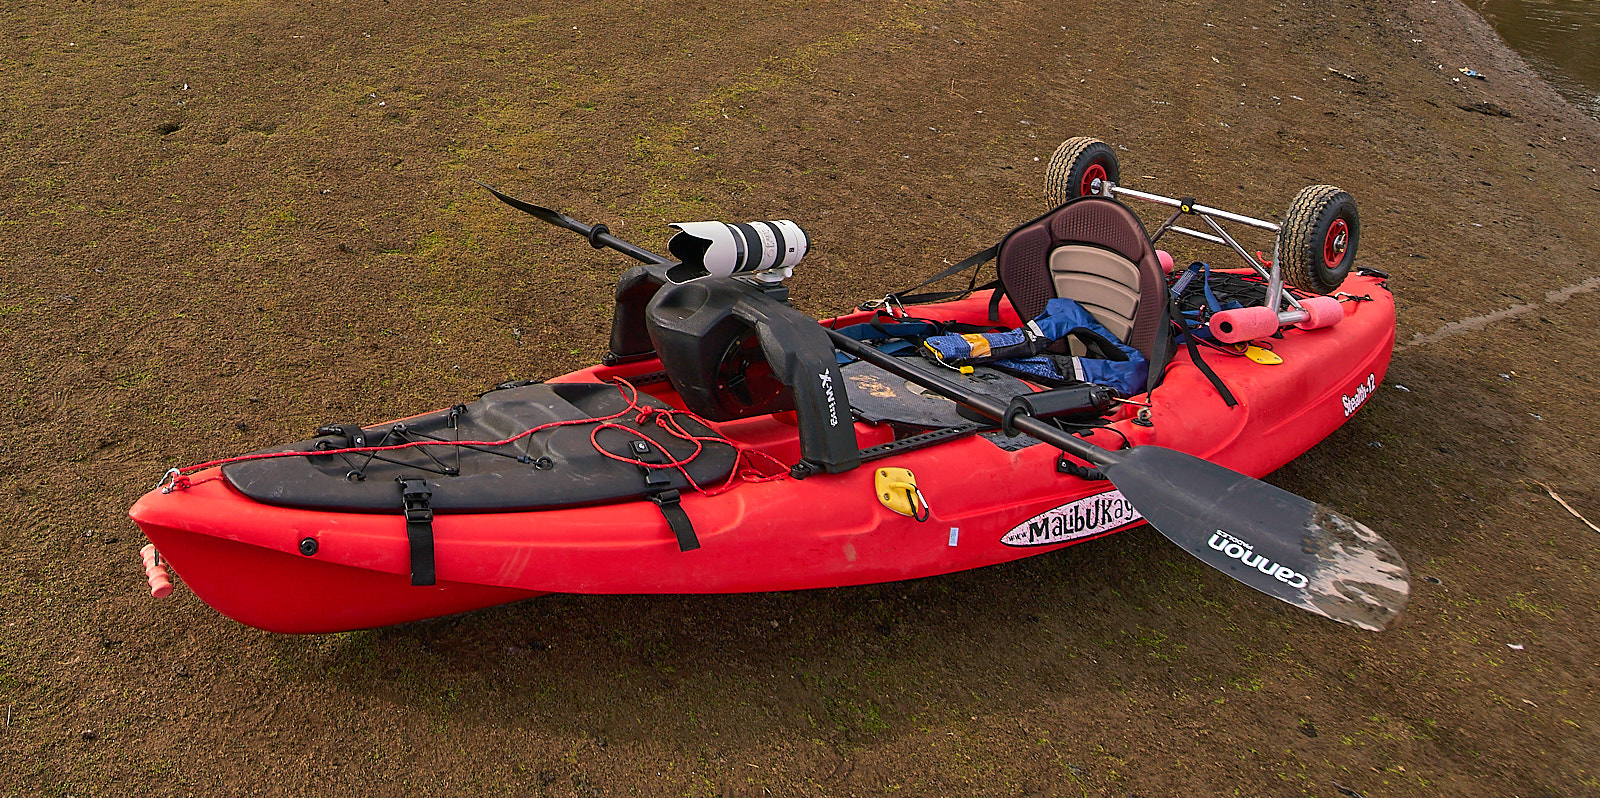
From here my next recommendation is towards a fishing Kayak, this is because the many reasons fishermen choose these also make them ideal for photography. The extra stability and storage means they are a better photography platform and the storage options means there are places to put camera's and lenses. The downsides are in speed, cost and weight.
Some of the best fishing kayaks come with pedals connected to flippers or a propeller, Native and Hobie being decent brands. Initially these seem perfect for photography, the concept of having two hands free whilst your legs propel you along seems ideal.
In practice this doesn't work as well as expected. You will rarely have two hands free as one is required to adjust the rudder (kayak's move around a fair bit). Additionally as your legs are in constant motion you have no lap to rest a camera on, there just isn't a safe space to put the camera down when in motion and the best storage location will be behind you. For a small compact camera you should be fine, but for a full size camera and lens the placement can become difficult.
The other major drawback to the pedal kayak's is the depth of water required, the requirement to have 30cm of water underneath you can be extremely limiting in wetlands and the shallow area's. If you want to transition to shallow water regularly the process can be awkward, It's even more challenging with expensive electronics on board.
Fo me the prime reason to choose a fishing kayak is to have extra storage to put your camera. From experience, sooner or later you will need a completely dry place to put everything away. Rain, wind and waves will surprise you at some point. I have been in a number of conditions where the camera would have been destroyed without a safe contained place to store it.
Many fishing kayak's have a live bait well, this is a self contained space (that can be plumbed to supply fresh water to the bait) thats essentially an onboard aquarium! Once closed this space is an ideal place to place your camera, its generally accessible under your legs and designed to be sealed (nowhere is truly sealed I know this from expensive experience). I can place a Camera fitted with a 100-400 lens inside my kayak's bait tank and happily stand on the lid, its almost perfect.
Aside from this most fishing kayaks have attachments for ropes, rods, anchors and other places to store things, these are useful for photographers as well. Batteries,Tripods, Cleaning gear, lenses and filters have to go somewhere...
Now for the Camera!
The good news is that there isn't really any specific camera needed, if kept dry almost any camera is suitable, from a phone to a high end landscape kit, almost anything goes. The main consideration here is the issue of physical storage when on the water.
If you are selecting a camera specifically for this, obviously some amount of water protection is useful but mostly a decent image stabilization system is the most useful feature.
There are some important camera accessories though,
As well as the above there are other things that will generally make things easier,
Soft cloths, used for general wiping when water inevitably lands where it shouldn't
Sponge, for when the cloths are just not enough (It'll happen eventually).
Gloves, A pair of fingerless gloves to assist in gripping the paddle, after a few hours of paddling these will be well worth it. There are many dedicated gloves available but I suspect any sporting gloves will be better than nothing. Photography gloves are also available but most lack the grip required when paddling.
Portage Wheels, as you will now have to carry the kayak and the camera gear, kayak wheels are useful.
Clips, lots of clips usually inexpensive carabiner style. I clip everything onto my kayak its one less thing to worry about when it all goes wrong, if its clipped on it won't fall overboard. If it goes over it will only be wet, not lost.
Inflatable Life Jacket, I recommend an inflatable lifejacket for photography, in some cases you or the kayak will be twisting and turning, trying to get the shot, the inflatable jackets are just less restrictive and allow better movement. Just remember to pull the handle if you need it and service them as required.
Lights, Whilst its not recommended to be on a kayak at night its worth being cautious here, As a landscape photographer Dawn and Dusk are prime times to be out. It is especially dangerous to be on the water in these fringe times and if you get caught out its important to have the ability to be seen. As a safety precaution I keep a hiking/camping headlight in the kayak at all times.
Paddle Lanyard, Due to the nature of photography there will be many times where the paddle is put down whilst you take photo's. You may like your camera a lot but it's not the most important thing on a kayak. Keep the paddle safe!
Despite the risks, the reward of silently approaching wildlife or being alone in stunning landscapes is hard to resist, However you do it taking the camera out on the kayak is a great way of capturing and sharing your memories.
With careful risk mitigation you can return home with some stunning images to show and share.
Many things are harder when you are on a moving platform, photography is obviously one of them, these tips and tricks are useful on the water.
The normal shutter speeds need to be higher, with unpredictable oscillations it's important to be able to freeze the action. the 1/FL guide needs to be doubled at a minimum. Good image stabilization helps here but heading higher up the ISO range is a given to maintain crisp images. If shooting on program modes selecting Sports Mode is a safe way to get sharp images.
In many situations the focus points will be moving as the camera moves with you, This can make it very difficult to achieve the focus you want. (especially with longer lenses) knowing how to lock focus and then release is a key skill. For this reason Single shot focusing is a good option instead of continuous focus (I use Back Button Focusing to ensure the best results). Newer camera's with object tracking may be of some use here as well.
Pretty simple really but whenever possible lean forward and use your knees to rest your elbows on, this will give you the most stable position to shoot from.
Having the kayak pointed in the direction of the wave motion will always help in stabilizing the images, learning to twist and contort yourself to keep the camera stable is hard, it's almost impossible with waves hitting the side of your little boat.
Obviously kayaks are not easy to lock in a stable position, understanding the composition along with wind and water movement is a key skill. This means you will need to orient yourself and then let the kayak drift through the ideal shooting position. In practice this can take multiple attempts.
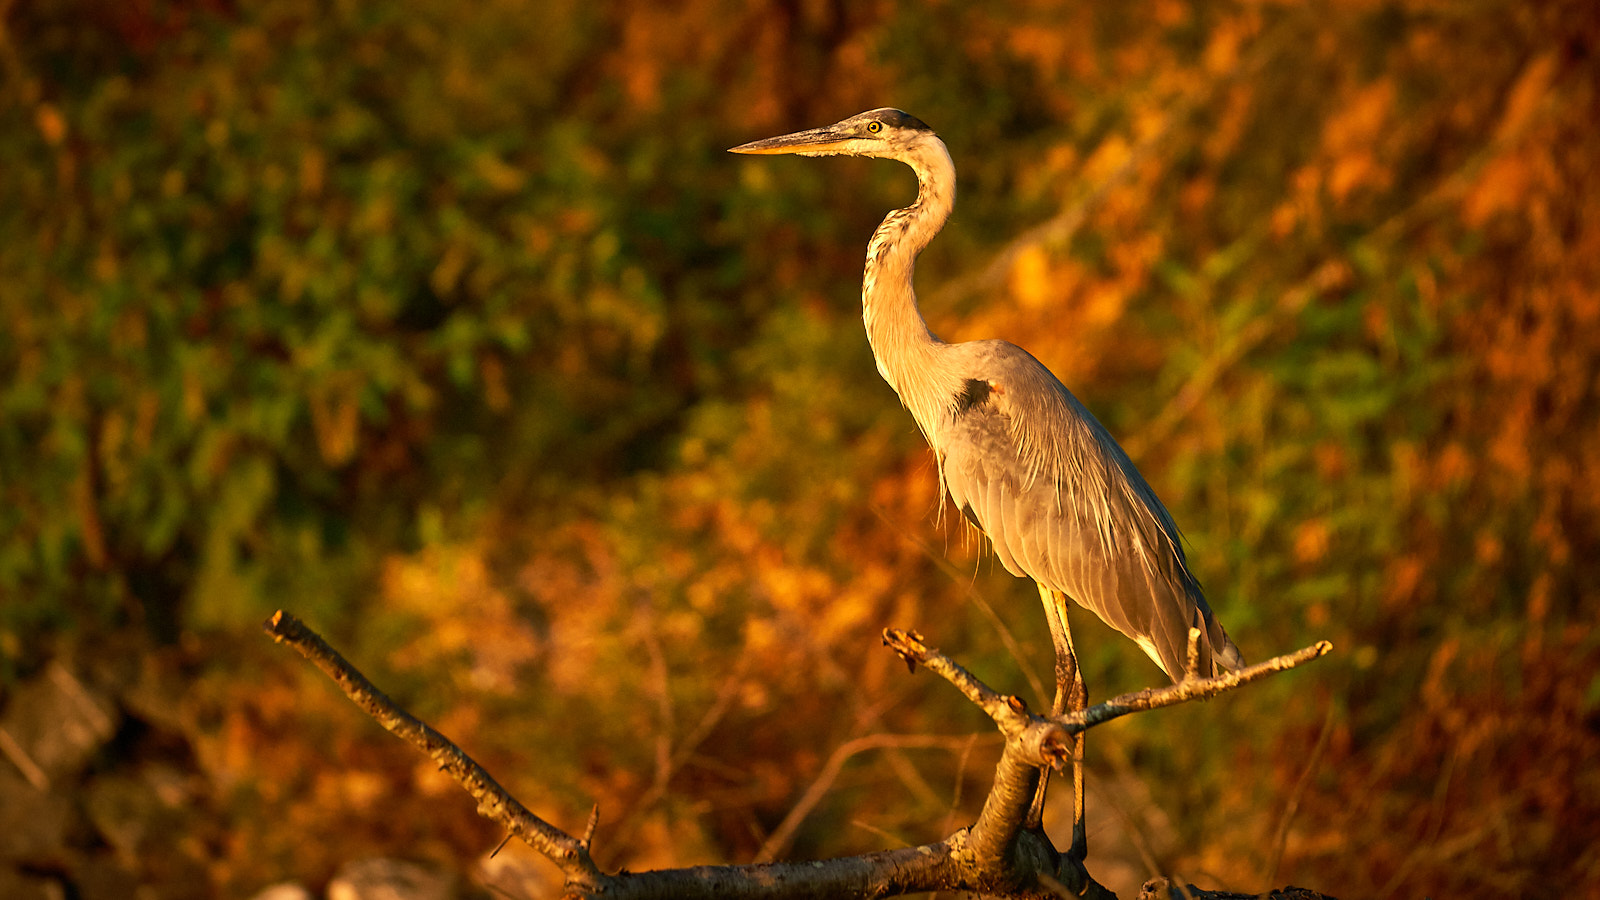
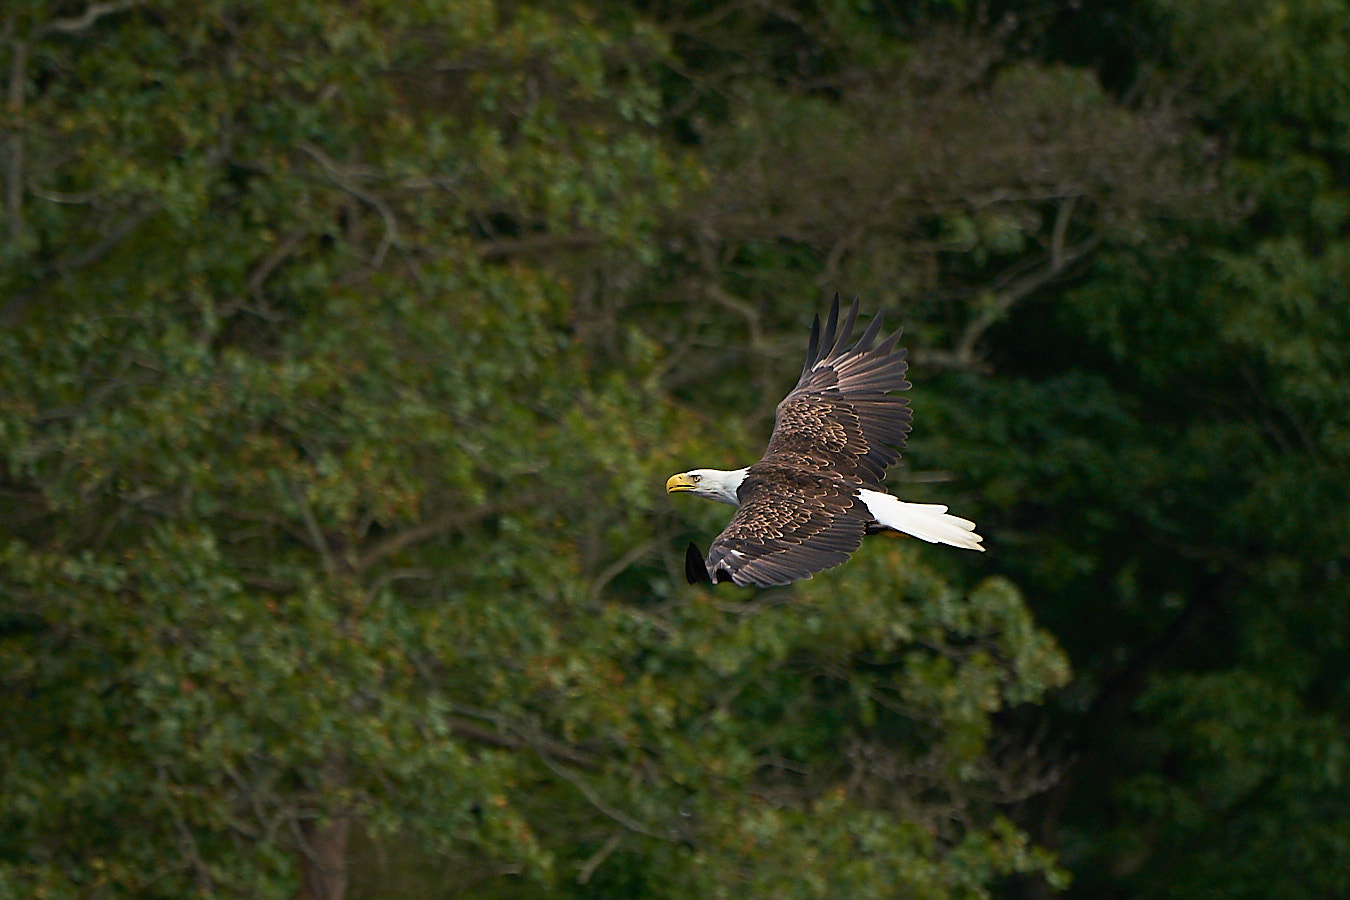
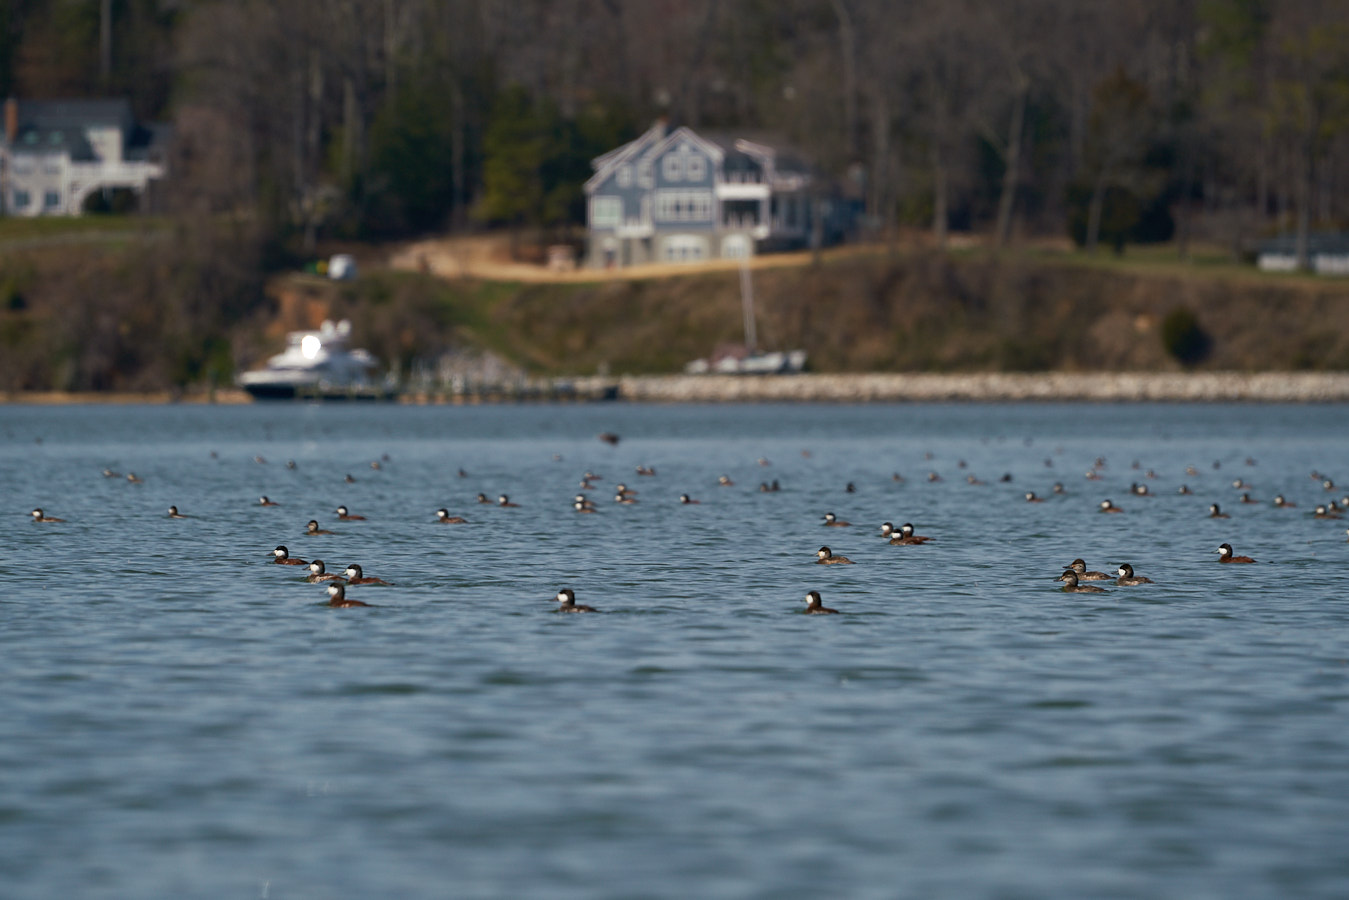
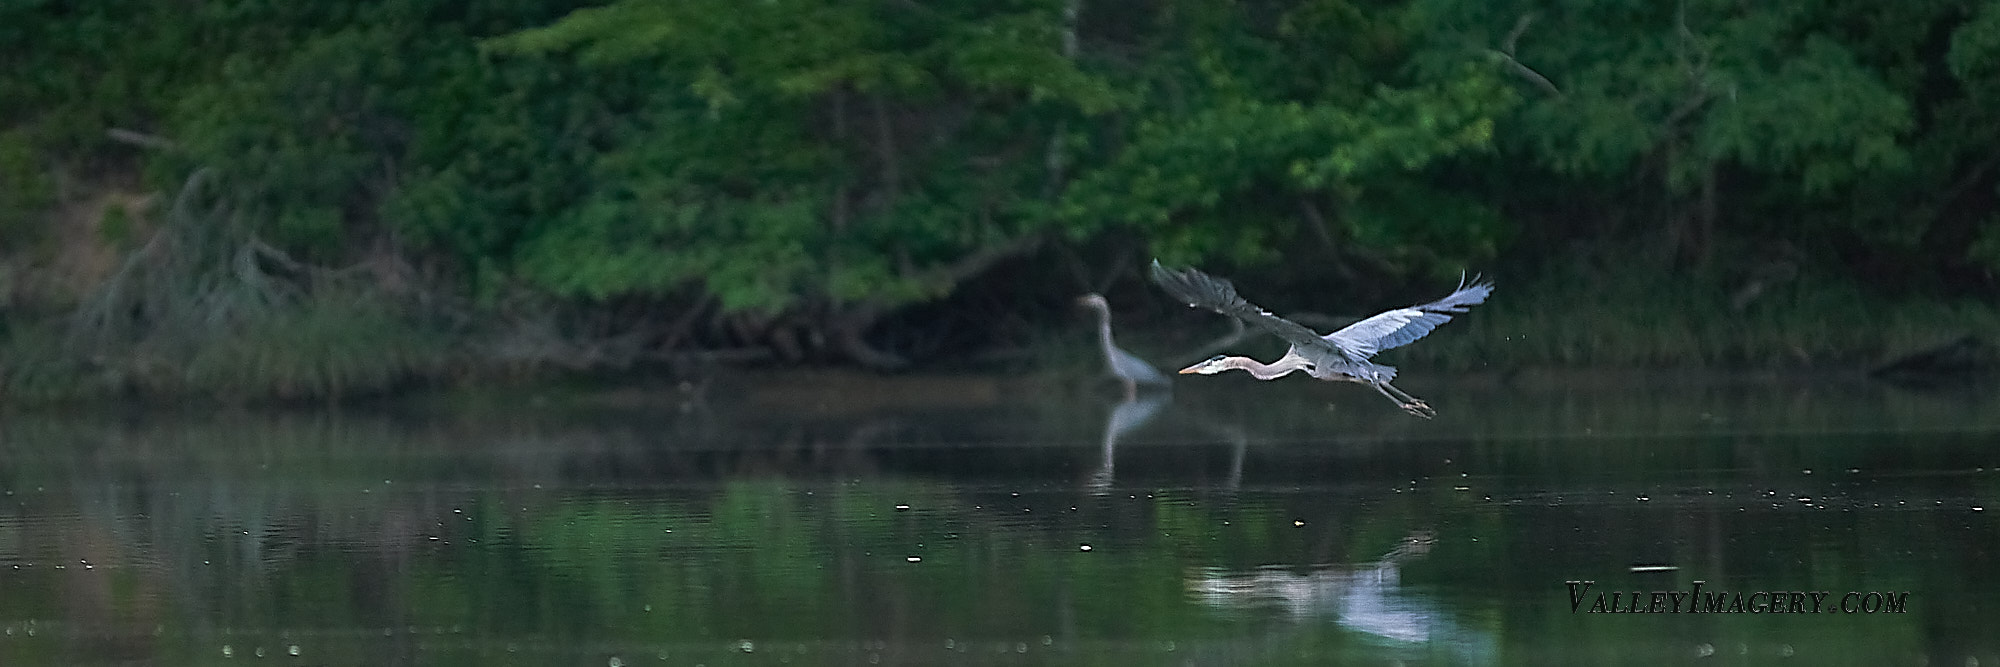
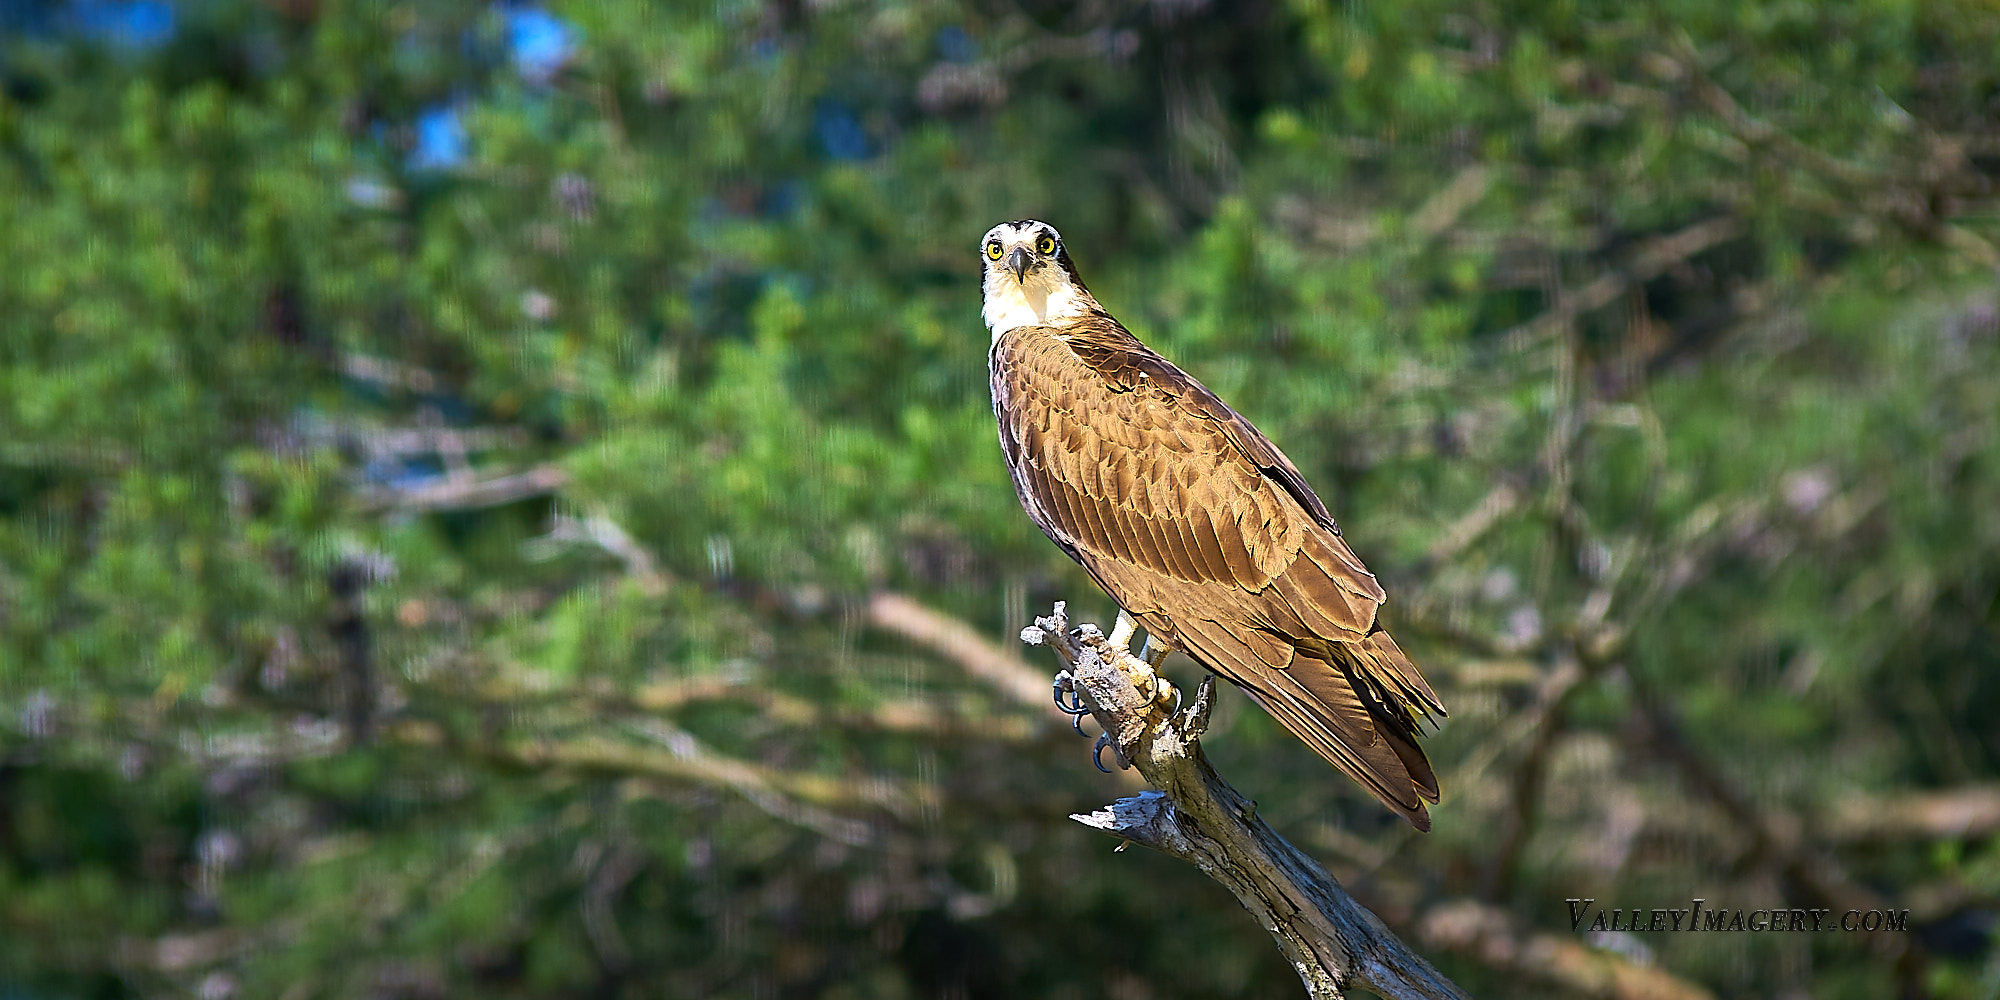
Wildlife often feed and sit near naturally occurring obstacles, trees, banks etc. It's surprising how close you can get by silently drifting past natural objects. Put the paddle down and get the camera ready and some great shots are achievable.
For wildlife I usually have the best success by slowly paddling directly at them, the lack of sideways movement means they have trouble judging distance. If you can drift directly at them (put the paddle away early) great shots are almost guaranteed.
Be prepared for the unexpected,
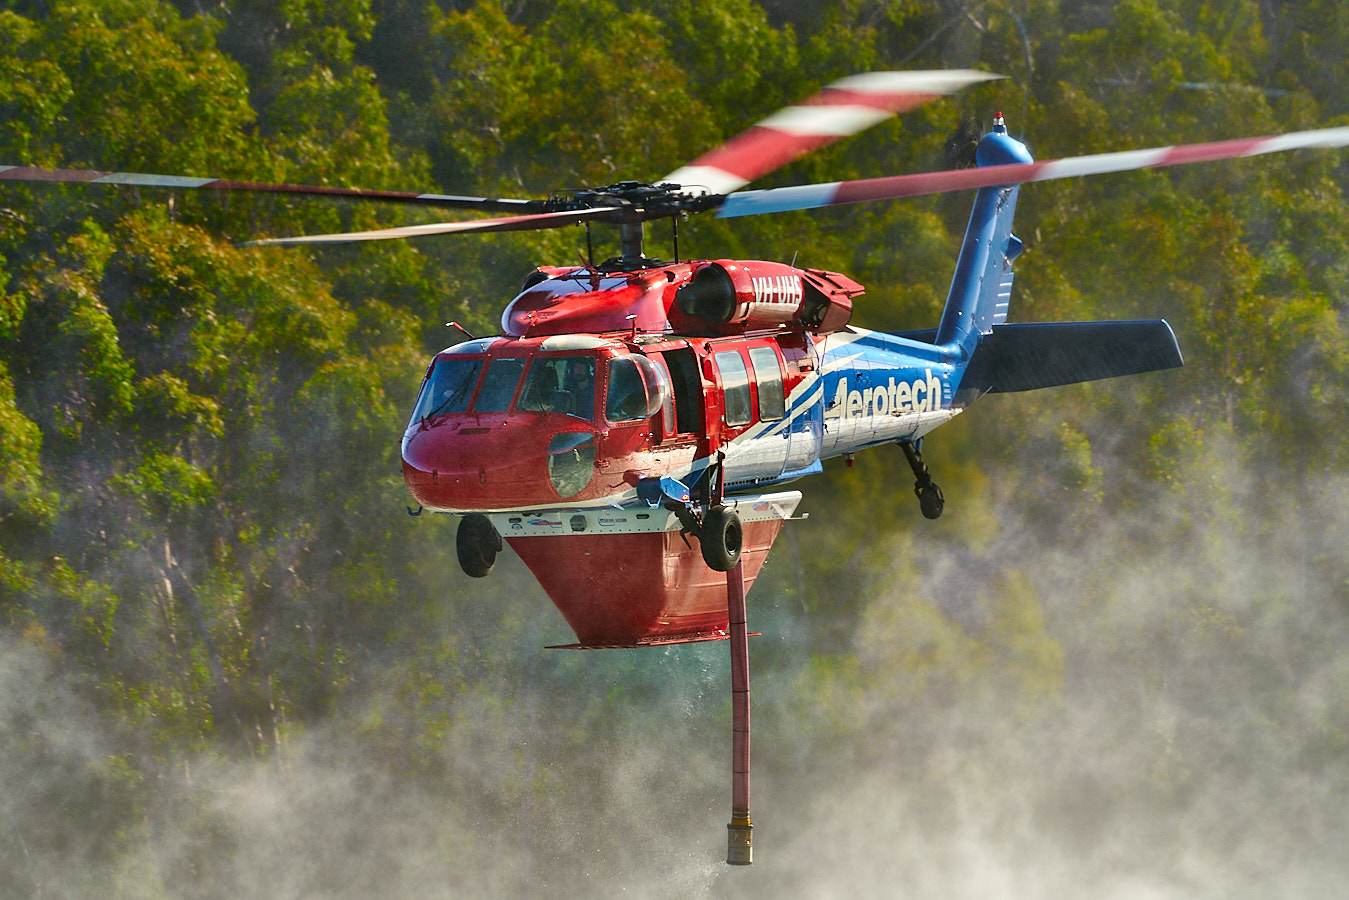
Its not often that a helicopter will drop in on you but as these shots show anything can happen. At the end of a relaxing paddle a local helicopter dropped into the water to test a newly fitted fire fighting kit. I managed some energetic paddling to get into position, not too close to be a danger or be buffered by downdraft, but close enough for some great images.
The X Wing.
Clearly with some serious star wars reference the team at Malibu designed a built an accessory called an X Wing. Whilst not completely necessary it has made my photographic experience on the kayak much easier. Its best described as a sliding console and has internal storage large enough for one or two lenses, I usually store the wide angle zoom in this space. The X-Wing is an add on though and requires drilling rails to the kayak and then modifying the X-Wing to be a camera platform. As this is built for specific Malibu kayaks its rare that any other kayak could be outfitted with one.
In my case I have created a custom addition to the X-wing which allows my camera to sit well above the water line and in an easily accessible place. In addition I have also built a paddle holder onto the wing so I can put the paddle down while i'm holding the camera. This configuration allows me to comfortably paddle with the camera and when pushed forward avoids the minor drips from the oars creating issues.
The X-Wing is tailored to only fit certain Malibu Kayaks. However despite this I feel it provides the best solution to carrying larger cameras out onto the water. I haven't seen a similar product and availability seems limited, get one when you can.